
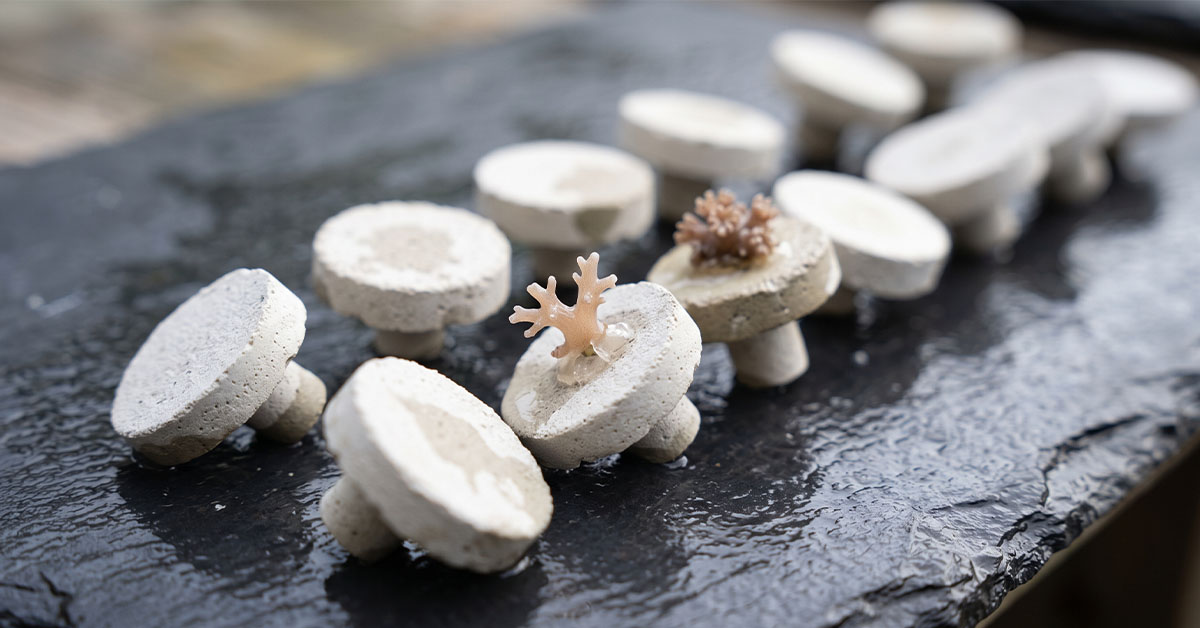

Making frag plugs is the cheapest and most overlooked step in coral fragging. Every piece you cut needs something to sit on, and nobody wants a zoanthid colony tumbling around in the current. The shopping list for making frag plugs runs to three items you probably have within reach, and the hard part is not the mixing, it is the waiting.
What Does a Frag Plug Actually Do?
Glue a coral cutting straight onto your main rockwork and you give up three things at once: the ability to move the piece, the freedom to change its position as light and flow demand, and any control over how far the colony spreads. Making frag plugs hands all three back to you. The piece sits on a small, portable base, so as it grows you can move it, sell it, trade it or put it somewhere else entirely.
Spread control is the part most aquarists learn the hard way. Almost every coral will spread given the right conditions, and in some species that tendency turns into a long-term problem. Once fast-growing zoanthids settle onto your main rock, removing them cleanly becomes close to impossible. A colony sitting on its own plug you simply pick up and lift out.
Soft corals are the easy end of this. With species like the Neon Pineapple Tree Coral (Capnella sp.) you just tie a branch cut from the colony onto a plug and within a few weeks it becomes a new colony. Fragging technique itself varies from species to species and deserves its own article; this one covers only the plugs.
What You Need for Making Frag Plugs
The list for making frag plugs is short: a binder, sand, water and a mould. What matters is less which product you buy than which one you leave on the shelf.
Cement
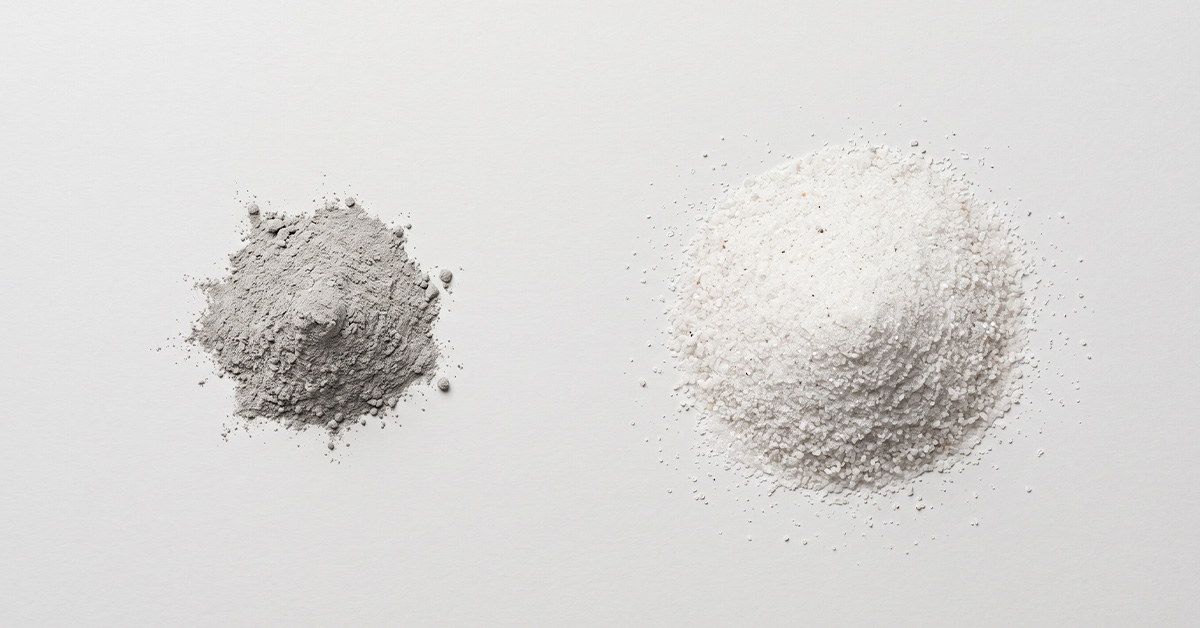
Buy plain Portland cement, ideally the white version, because coralline algae are easy to track by eye as they creep across a pale surface. If the bag says anything other than cement, that product is not right for making frag plugs. Most ready-mixed mortars sold in builders’ merchants have extra substances blended in to improve adhesion and strength; their labels carry words like “repair mortar”, “rapid set”, “waterproof” or “flexible”. What those substances are is not printed on the bag, and what they release into your aquarium water is anyone’s guess.
The age of the bag is a criterion too. The soluble chromium (VI) that occurs naturally in cement is held below 2 ppm by a reducing agent added during production, and the declared effective life of that agent is 61 days from despatch for bulk cement (MPA Cement, 2015). The limit exists for the allergic dermatitis wet cement causes on skin, not for aquariums. It still tells you something concrete: a bag that has been sitting in the garage for years has both gone lumpy and long outlived that window. Wet cement burns skin, so wear gloves and eye protection and do not breathe the dust.
Aragonite Sand
Crushed coral or aragonite aquarium sand, grain size 0.5-2 mm (0.02-0.08 in). Aragonite is a form of calcium carbonate, the same mineral that builds coral skeletons. The reason to choose this sand is not only appearance: measurements on concrete blocks that spent years underwater found their carbonate phases mineralogically similar to coral skeleton (Souza et al., 2025). Silica-based play sand costs less but does not give you that similarity.
Porosity matters less in a cast plug than in live rock, because the plug’s job is to carry the coral rather than to act as a biological filter; even so, a rough surface speeds up coralline attachment. The fact that pore volume decides more than material does works the same way in choosing live rock.
Water
Tap water is fine for mixing. Everything in it leaves again with the water you replace over and over during curing. RO water matters later, when you measure whether the cure has finished.
Mould
Silicone ice cube trays, jar lids, the impression of a ready-made plug pressed into wet sand or simply shaping by hand will all do the job. Ready-made ones are usually sold as frag plugs. The established size for making frag plugs is a 20-25 mm (0.8-1.0 in) head on a 10-15 mm (0.4-0.6 in) stem.
What Is the Right Cement to Sand Ratio?
Hobby sources offer every ratio from 1:3 to 1:7, and they all agree on one thing: cement stays in the minority. As a working range for making frag plugs we suggest 1 part cement to 4-5 parts aragonite sand. Parts means a container, not a scale; the same cup for both is enough.
| Mix | Result | Cure time |
|---|---|---|
| 1:3 (cement heavy) | Strong, smooth plug, more lime released | Lengthens |
| 1:4-1:5 (recommended) | Enough strength, rough surface | 4 weeks and up |
| 1:6-1:7 (sand heavy) | Very porous but brittle plug | Shortens |
Adding the water by eye is fine, and you set the consistency to suit the job: pourable for a mould, stiffer if you are shaping by hand, since a stiff mix takes shape more easily. The one limit is too much water. The more you add, the more void space forms inside the cement paste, and once set the plug crumbles under your thumb. If the mix has reached the consistency of damp sand you are there; you do not need a slurry.
Casting and Demoulding When Making Frag Plugs
Once the mould is filled, tap it against the table a few times. That brings trapped air bubbles to the surface; leave voids inside and the thinnest part of the plug, the stem that goes into the hole in your rock, snaps at the first touch. If you want a small seat on top for the coral, press a toothpick in before the mix sets and pull it out again.
This is where the most misunderstood step in making frag plugs begins. Cement does not dry, it hardens with water. Putting the plugs you demoulded after 12-24 hours in the sun or on a radiator lowers their strength; the setting reaction stops halfway and the plug crumbles at the edges. The opposite is what you want: keep the plugs damp for 3-7 days, under a wet cloth or in a closed container. When that time is up the plug rings solid in your hand and the real wait begins.
Why Does Curing Take Weeks?
When Portland cement reacts with water it produces calcium hydroxide, or portlandite. That compound pushes the pore water to around pH 12.5, and the moment the plug goes into water it starts handing that lime over. Set against your aquarium’s target range of 8.1-8.4, the two are not even comparable.
How long it takes has been measured. Portland cement samples placed in seawater started at roughly pH 12.5 and settled at an equilibrium value near 9.2, but the experiments ran for at least 30 days to reach that equilibrium (Wang et al., 2026). In concrete mixes made for artificial reefs, static tap water passed pH 10.5 within two days; renewed completely at every measurement, seawater held steady around 9.0 instead (Long et al., 2026). So what sets the length of the wait is not the calendar, it is how many times you change the water.
What happens over the long run is a chemical conversion. Concrete blocks that spent years underwater had no portlandite left at all; carbonation had turned it into calcite and magnesian calcite, and the measured pH had fallen to 9.7 (Souza et al., 2025). In your bucket the same process will run on a far smaller scale.
In practice the cement curing step in making frag plugs means at least 4 weeks, changing the water every 2-3 days. Speeding it up with vinegar is common practice; acetic acid neutralises calcium hydroxide, so a few hours in vinegar diluted 1:10 followed by a thorough rinse will shorten the job. Dropping the plugs into a toilet cistern, on the other hand, is a poor idea. Cistern water changes a few times during the day and not at all overnight, the cistern holds metal parts, and many households keep a cleaning tablet in there. On top of that it is neither somewhere you can take a measurement nor somewhere you want to look.
How Do You Know the Cure Is Finished?
Most sources on making frag plugs give you a duration, but a duration is a guess rather than a result. What you need to measure is not the plug, it is the water you soaked it in.
- Put the plugs in a clean bucket filled with 10 l (2.6 gallons) of RO water and run an air stone.
- Wait 24 hours.
- Measure the pH of the water. Taking that reading with a reliable kit matters; the detail is in choosing test kits.
- If the value is above 8.4, empty the bucket, refill it and wait another week.
- Once two consecutive readings stay below 8.4, your plugs are ready.
You use RO water so the measurement stays clean. Tap water has buffering capacity of its own, which hides the rising pH for a while and shows you a better result than you have. For the same reason you take the reading 24 hours later rather than on the day the plugs go in: the lime needs time to move into the water.
Five Common Mistakes in Making Frag Plugs
Treating every bag of cement as the same: blended and rapid-set products were not designed for aquariums, and they do not share their contents either. Choose plain Portland cement.
Drying the plug too early: cement hardening is a reaction, not an evaporation. Lose the moisture in the first few days and you are left with a plug that crumbles.
Curing by the calendar: “I waited a week or two” is not a measurement. At this step the only criterion that counts is the pH of the soak water.
Not renewing the water: in static water the pH hits the ceiling in two days and stays there; change the water and the release continues. What finishes the cure is renewal, not waiting.
Adding too much water: a runny mix fills the mould easily but takes most of the strength with it. You can cut back an excess, you cannot create what is missing afterwards.
None of these five mistakes is about your budget, all of them are about patience. Making frag plugs is a cheap job whose only cost is the waiting, and once you end that wait with a measurement you have a base you can safely put your coral on.
Have you tried making frag plugs yourself, and which mould and ratio did you use? In which week did your soak water finally drop below pH 8.4? Leave it in the comments below. That way the next aquarist taking this on starts from the value you measured instead of guessing how many weeks to wait.
Frequently Asked Questions (FAQ)
Which cement is used for making frag plugs?
Plain Portland cement, ideally the white version. Ready-mixed mortars, rapid-set repair products and anything labelled “waterproof” or “flexible” are not suitable, because the substances blended into them are not printed on the label and what they release into water is unknown. White Portland cement has one extra advantage: coralline algae are easy to follow by eye across a pale surface.
How long should a frag plug soak?
You need at least 4 weeks, but in making frag plugs what decides it is the measurement rather than the duration. Change the water every 2-3 days and track the pH of the soak water. The plug is ready when the value stays below 8.4 in two consecutive readings. Experiments on Portland cement reaching equilibrium in seawater ran for at least 30 days, which is why a wait of one or two weeks falls short in most cases.
Why aragonite sand instead of silica sand?
Aragonite sand is calcium carbonate based, which brings the plug mineralogically closer to coral skeleton. Measurements on concrete blocks recovered from the sea found their carbonate phases similar to natural coral samples. Silica-based play sand is cheaper and works mechanically, but it does not give you that mineral similarity and its surface is less welcoming to coralline algae.
Does curing a frag plug with vinegar work?
It does, and it is the one shortcut worth taking when making frag plugs, because the acetic acid in vinegar neutralises the calcium hydroxide coming out of the cement and shortens the wait. A few hours in vinegar diluted 1:10 followed by a thorough rinse is enough. The method does not replace water changes; after the vinegar bath you still measure in RO water and wait until the pH stays below 8.4.
What can I use as a mould when making frag plugs?
Silicone ice cube trays, jar and bottle lids, the impression of a ready-made plug pressed into wet sand, or shaping by hand will all work. Silicone moulds are the most practical because they need no release oil. The established size is a 20-25 mm (0.8-1.0 in) head on a 10-15 mm (0.4-0.6 in) stem, which fits most commercial frag racks and rock holes.
Is making frag plugs really cheaper than buying them?
It is, but the real gain in making frag plugs is in quantity and shape rather than price. One bag of cement and one bag of aragonite sand will cast hundreds of plugs, and you set the diameter and stem length to match your own rockwork. What you pay instead is time: curing takes weeks, so you cannot start on the day you need them.
Cover Photo Credit: Reef Network AI
References:
- Long, S. et al. (2026). Mechanical Anisotropy, Water Absorption, and Alkali Leaching of Two Regional 3D-Printed Concrete Formulations for Artificial Coral Reef Applications. Construction Materials, 6(5), 62.
- MPA Cement (2015). Chromium (VI) and cement. Fact Sheet 10.5. Mineral Products Association, London. Manufacturer data. Accessed 9 September 2026.
- Souza, W. M. de et al. (2025). Mineralogical and Mechanical Characterization of Concrete Blocks for Artificial Reefs: A Comparative Study with Natural Coral Skeletons. Journal of Marine Science and Engineering, 13(10), 1886.
- Wang, Y. et al. (2026). Experimental Determination of Solid-Liquid Equilibrium of Calcium in Portland Cement Under Seawater Exposure. Materials, 19(10), 2117.