

Aquarium heater selection is perhaps the most critical decision for any saltwater enthusiast. Experienced hobbyists know that your aquarium heater selection acts as the primary insurance policy for your delicate ecosystem. Using a poor-quality device can lead to a total system crash—either by letting the aquarium drop to dangerous temperatures or, even worse, “cooking” the water. This week at Reef Network, we are diving deep into how to make the right choice to protect your livestock and maintain a stable environment.
Why Aquarium Heater Selection Matters for Safety
A faulty aquarium heater selection does more than just keep your water temperature unstable; it puts your corals and fish under extreme stress. In the wild, reef temperatures stay remarkably stable. In a closed home system, a variation of just a few degrees can trigger coral bleaching or outbreaks of parasites like Ich.
Furthermore, heaters made from inferior materials can cause electrical leaks or even fires. The thermostat mechanisms in cheap models are prone to “sticking” in the “on” position. Because these devices are essentially high-wattage resistors submerged in salt water, a failure can raise the temperature to lethal levels (above 30°C / 86°F) within just a few hours. Therefore, your aquarium heater selection should never be based solely on the lowest price.
Technical Criteria for Aquarium Heater Selection
Before finalizing your aquarium heater selection, you must focus on real-world reliability rather than just brand marketing. Choosing the right heating equipment is a fundamental step in a successful Saltwater Aquarium Setup, as stability is the cornerstone of reef keeping. While ‘expensive’ doesn’t always mean ‘perfect,’ a budget-driven choice is almost always a risk in the marine hobby. Here is a detailed breakdown of the technical aspects you must evaluate to ensure your system remains stable.
1. Power and Volume (The Wattage Rule)
A key part of the aquarium heater selection process is calculating the correct wattage for your specific volume. A general rule is 1 Watt per 1 Liter (approx. 3-5 Watts per Gallon). However, environmental factors play a massive role. If your aquarium is located in a basement or a room that drops to 15°C in winter, your aquarium heater selection should lean toward a higher wattage, around 1.5 – 2 Watts per Liter, to compensate for the heat loss to the ambient air.
2. Physical Dimensions and Sump Fit
As wattage increases, so does the length of the heating element. A high-quality 300W heater can reach 50 cm (20 inches) in length. If your sump chamber is only 40 cm high, your aquarium heater selection must account for horizontal placement or specialized “short-body” models. If the heater is too long and sticks out of the water, the glass will overheat and shatter, or the internal thermal fuse will blow, rendering the unit useless.
Materials Used in Aquarium Heater Selection
The material of the heater determines its resistance to the corrosive effects of saltwater. The most commonly used materials are Titanium Heaters, Glass Submersible Heaters, Cobalt and Polymer Heaters.
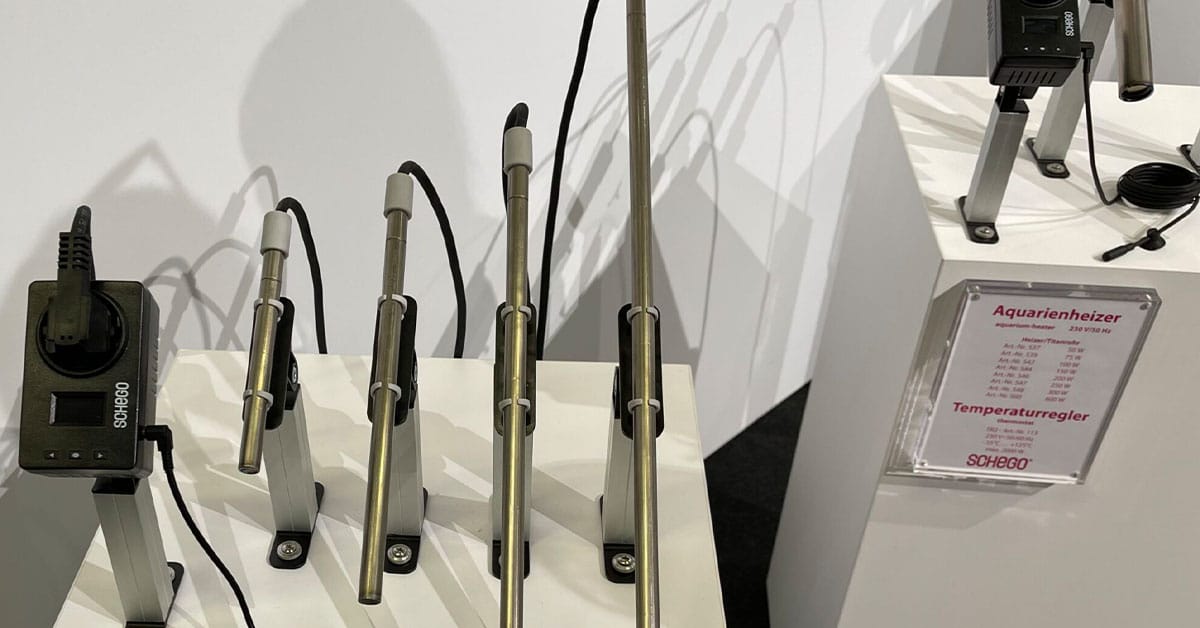
Titanium Aquarium Heaters (The Professional Choice)
For serious reefers, the best aquarium heater selection is a titanium-bodied unit. These are often “blind” units, meaning they have no built-in thermostat or control dial; they are simply heating elements. Because they cannot turn themselves on or off, they must be plugged into an external temperature controller. This setup is safer because the heavy-duty external controller is much more reliable and precise than the tiny, cheap thermostats found inside standard glass heaters.
The real safety benefit of this aquarium heater selection comes from separating the “heating” part from the “thinking” part. If a titanium heating element fails, it simply stops working, and the external controller immediately triggers an alarm to warn you of the temperature drop. Unlike glass heaters where the thermostat and heater are in the same tube—often leading to the thermostat “melting” or sticking “on”—this split system prevents the heater from accidentally cooking your tank due to an internal sensor error.
Glass Submersible Aquarium Heaters
The most common choice in aquarium heater selection, glass heaters are economical and widely available. However, they carry a risk of shattering due to thermal shock or physical impact from large fish or rockwork. If you choose glass, ensure it is made of laboratory-grade borosilicate glass, which is more resistant to temperature fluctuations.
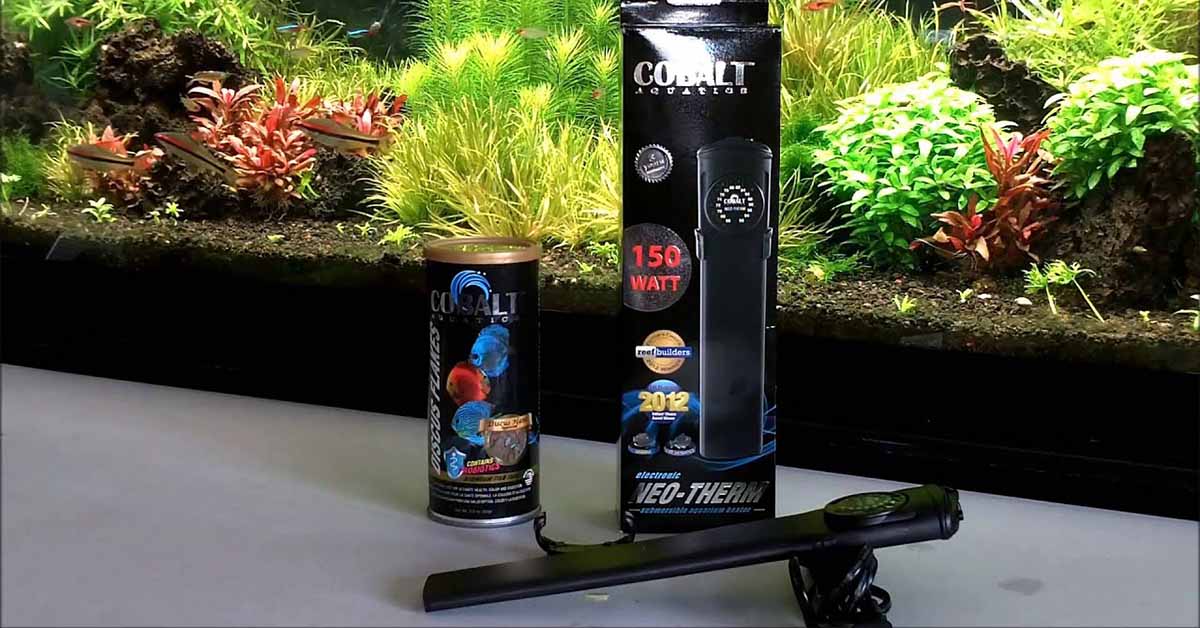
Cobalt and Polymer Aquarium Heaters
These are modern, shatterproof alternatives often used in nano reefs. While they are incredibly durable, they are usually limited in wattage (up to 150W-200W). If you have a smaller system, this type of aquarium heater selection offers the best balance of safety and aesthetics.
The Dual Heater Strategy: Redundancy is Key
A major pro-tip in aquarium heater selection is splitting the total required power between İki smaller units. This is known as a redundant heating system.
- Scenario A (Failure to Off): If you have one 300W heater and it dies, your tank temperature drops rapidly. If you have two 150W heaters and one dies, the remaining unit will still provide enough heat to slow down the temperature drop, giving you time to buy a replacement.
- Scenario B (Failure to On): If one 150W heater sticks “on,” it is unlikely to have enough power to “cook” a 300L tank on its own. It will raise the temperature, but much more slowly than a 300W unit would, allowing your temperature alarm to notify you before a catastrophe occurs.
Placement and Flow Dynamics
Your aquarium heater selection is only as good as its placement. Heaters should always be placed in high-flow areas. In a sump, the best location is near the baffles where water is forced to move over the heating element. Without adequate flow, the heater will create a “hot pocket” of water around itself, causing the internal thermostat to shut off prematurely while the main display tank remains cold. This leads to “short-cycling,” which quickly wears out the heater’s internal components.
Maintenance and Long-Term Reliability
Once you have made your aquarium heater selection, the work isn’t over. Saltwater causes “creep” (salt buildup) and calcium deposits on the heater’s surface. This white crust acts as an insulator, forcing the heater to work harder and longer to achieve the same temperature. Every 3-6 months, soak your heater in a 50/50 mix of white vinegar and water to dissolve these deposits. This simple maintenance task can extend the life of your aquarium heater selection by several years.
FAQ (Frequently Asked Questions)
Does aquarium heater selection change for nano tanks?
Absolutely. For systems under 40 liters, your aquarium heater selection should focus on compact, preset, or polymer-coated heaters. Large glass heaters are difficult to hide in small back chambers and can easily be damaged during routine maintenance.
How often should I update my aquarium heater selection?
Even the highest quality heaters are subject to mechanical wear. Most experts recommend replacing your aquarium heater selection every 24 months. Think of it as a preventative maintenance cost rather than waiting for a failure to occur.
Is calibration part of aquarium heater selection?
Yes. Never trust the dial on a new heater implicitly. After finalizing your aquarium heater selection, test the unit in a separate container for 24 hours. Compare the heater’s setting to a laboratory-grade digital thermometer and adjust the calibration ring if the unit allows it.
Cover Photo Credit: Eheim
References:
- Oxford Academic: The Impact of Acute Temperature Changes on Marine Life / Last Access Date: 01.02.2026
- PubMed Central (PMC): Effects of Temperature on Metabolism and Growth of Corals / Last Access Date: 01.02.2026
- Frontiers in Marine Science: Thermal Stress and Survival Strategies of Coral Reef Fish / Last Access Date: 01.02.2026